Happy Days for Creative Expressions
Hi All.
Welcome to Friday, and my share for today for Creative Expressions.
I have again used the wonderful clear stamp sets designed by John Lockwood for Creative Expressions. I have really enjoyed showing you how many different looks you can get from using just a couple of stamp sets.
Have you discovered Bloglovin, it’s a fabulous place to be able to follow all of your favourite blogs and receive updates so that you never miss any inspirational posts. I would like to invite you to follow me also by clicking on the link below
![]()
Creative Expressions supplies used
- Clear stamps sets – Pierced Tag Sentiments
- Clear Stamp sets – Snowdrop Elements
- A4 Embossing Folder
- Craft Dies, by Sue Wilson – Pierced Tags
- Finishing Touches – pearl swirls
- Always & Forever Wedding Collection, Satin Ribbon peach
- Always & Forever Wedding Collection, Vintage Metal Lock Charms
- Cosmic Shimmer Colour Cloud – Sunlit Cedar
- Neutral Foundation Card- Milk
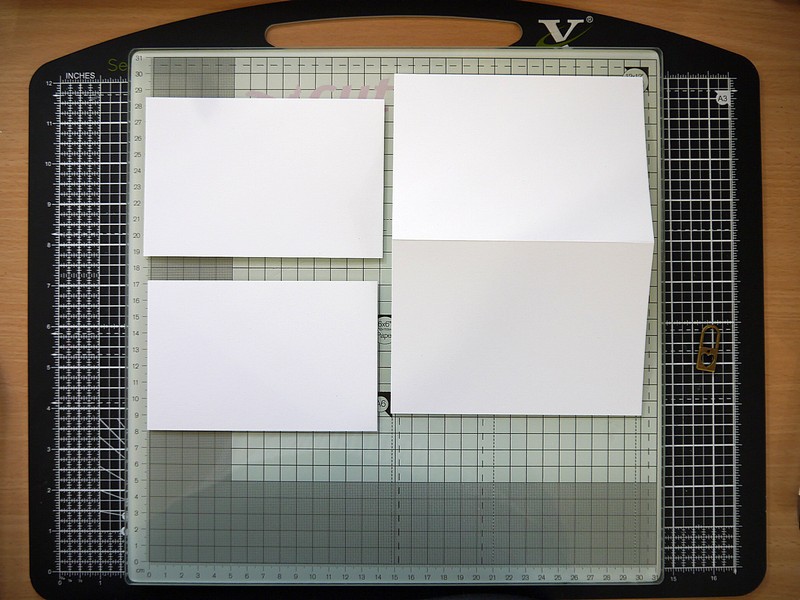
1. From one A4 sheet of milk foundation card cut
- one tent C6 card blank 21 x 15 cm (folded down the middle)
- one layer 14 x 9cm
- one matting layer 14.5 x 9.5cm
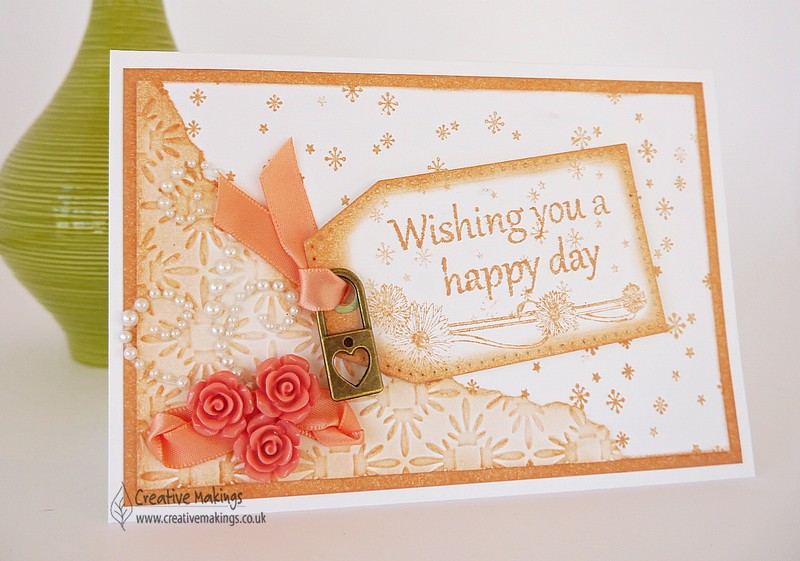
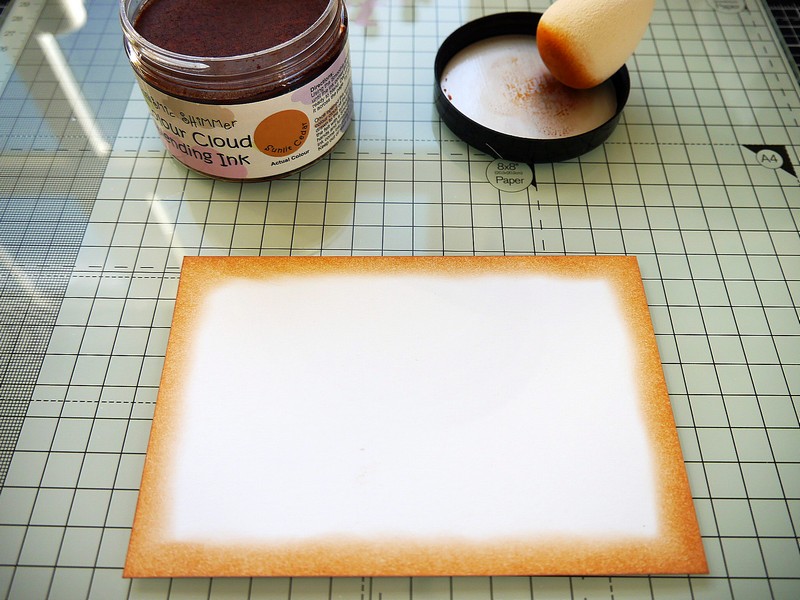
2.Cut a second layer measuring 14 x 9 cm and run through a die cutting machine with the embossing folder. Tear away a corner section (in the landscape direction) as shown below. Apply colour cloud ink to the smaller of the corner pieces (again as shown below). Set aside to dry properly.

3.Take the snowflake and star stamp from John Lockwood’s Snowdrop set, and stamp the 14 x 9 cm layer randomly all over – inking the stamp with the colour cloud ink and smoothie sponges.

4. Take the 14.5 x 9.5 cm matting layer and apply the colour cloud ink all around the edge, again using the smoothie sponges.
5.Mat the stamped layer (from step 3) on to the layer from step 4. Take the coloured embossed corner and attach over the stamped piece of card, as shown in the photo below. Embellish the embossed section with the self adhesive swirls. Create some twists of ribbon, select 3 resin flowers, and arrange in a bouquet fashion, fixing them to the decorated panel with silicone glue gel.

6. Attach the whole panel to the front of the card base.
7.Die cut the largest pierced tag, and apply colour cloud ink around the edges as in step 4. Stamp a sentiment and flower embellishment onto the tag. Tie a length of ribbon through the punch hole of the tag, securing a metal charm in the process. use silicone gel to attach the tag to the front of the card.
Please click the link below to see what the other members of the Creative Expressions Design Team have been creating!
Thank you so much for joining me today, i hope I have given you some new ideas to create.
See you again soon,